
 There are a number of skills which you will require regularly whilst using Microsoft Office Word, especially if you are studying our Legal Secretaries Diploma course or working as a Legal Secretary. This article provides step-by-step instructions for some of the most regularly used tools so that you can master these commonly used skills.
Please note that the majority of Law Firms currently use Microsoft Office 2010, we have therefore based our advice on this version of the program. You may find that your version differs slightly, however, the directions should be similar across most other versions.
Setting page margins
Page Margins are the spaces around the edge of the document. Setting page margins in Word is very simple. Once your document is open, simply click on the “Page Layout” tab and then click on “Margins”. This will open a drop down list of commonly used margins:
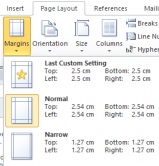
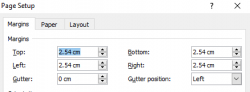
If you need to set a specific set of margins, click on “Custom Margins…” at the bottom of the list and a new box will open. You can then change the numbers in the boxes to set the margins you require.
Line spacing
Line spacing refers to the space between each line of text in the document. To set or change line spacing, you will need to highlight the relevant piece of text and then click on the “Home” tab. In the “Paragraph” box, you will find the following icon:
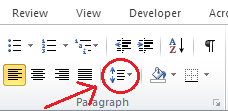
Click on this and a drop down menu will appear of commonly used line spacing. If you wish to enter line spacing not on the list, click on “Line Spacing Options…” which will open the box on the right below. You can use this to enter to enter the line spacing in the box circled below.
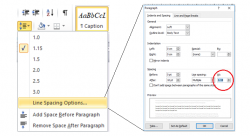
Another useful aspect of this feature is the option to change the spacing before and after a paragraph. You can use it in the drop down menu:
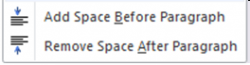
For instance, if you are entering an address at the top of a letter, you wouldn’t want large gaps between each line, therefore you would highlight the address and click “Remove space after paragraph”. If you hover over the option, you will also be able to see how the text will appear in your document before applying it.
Headers and footers and page numbers
A Header or a footer appears at the top or bottom of the page respectively. This is a commonly used feature to enter a letterhead for a company. To insert a header or footer, click on the “Insert” tab, then click either header or footer.
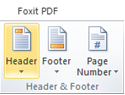
This will provide you with a number of templates which you can choose from. Select your chosen template and then enter the relevant information in each field. You can also delete any fields which you do not need and change the font, size and colour of your text. You can use exactly the same process to enter page numbers on your document.
Table
To insert a table in Word, click on the “Insert” tab, then click on “Table” this will give a drop down menu which allows you to select the number of rows and columns you need and will automatically insert this into the document. Don’t worry, you can always add or delete rows or columns if you don’t initially chose the correct number.
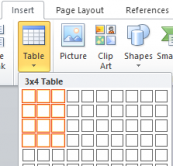
Table borders
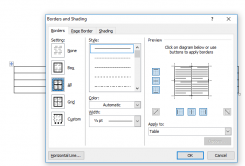
Table borders surround a table; you can choose to make them thicker, thinner or invisible. To set a table border, you can highlight the parts of the table you wish to change and then right click.

Click on “Borders and Shading” and this will open a box. Within this, you can set whatever types of border you would like and save the changes.
Insert columns
Columns are used to split your document into two or more separate vertical sections. This is a useful tool for setting out information side by side. To insert columns into your document, click on the “Page Layout” tab and then click on “Columns”. This will open a dropdown list and you can select how many columns you need.

We hope that you have found this simple guide useful. However, if you would like any further information, you can find lots of useful tutorials on the Microsoft website.